A sewer camera inspection is a non-invasive diagnostic procedure that uses a small waterproof camera fed through sewer lines to reveal hidden pipe problems in real time. The industry standard term is "sewer scope inspection," though both terms describe the same process. Understanding how sewer camera inspection works saves you from expensive guesswork and unnecessary digging. Drainpointplumbing has used this technology for over 15 years to diagnose plumbing issues across Santa Barbara County without tearing up a single yard. The process is faster, more accurate, and less disruptive than any alternative available to homeowners today.
How does the sewer camera inspection process work step by step?
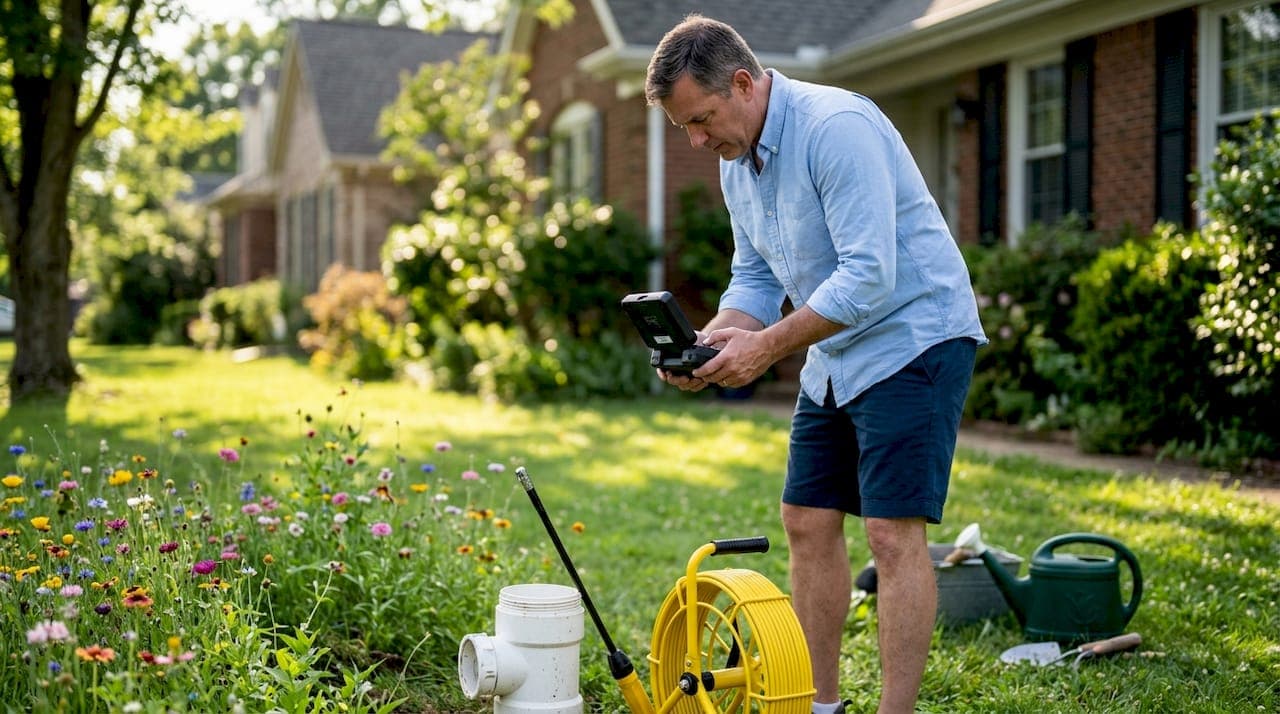
A sewer camera inspection begins with locating the right access point. The preferred entry is a sewer cleanout, a capped pipe fitting that gives direct access to the main sewer line. If your property has one, the technician removes the cap and feeds the camera in immediately.
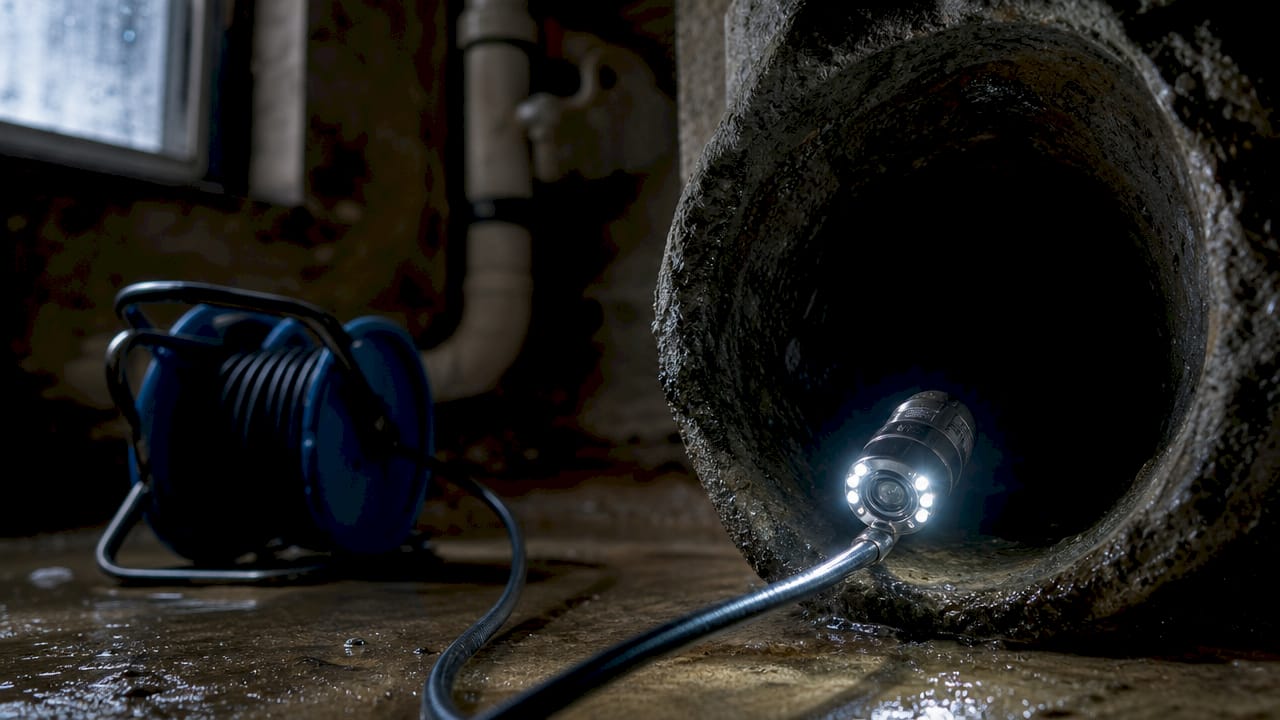
The camera itself is waterproof, mounted on a flexible cable, and equipped with bright LED lights. Those LEDs illuminate the inside of dark, wet pipes well enough to capture clear video. The cable is long enough to travel from your home all the way to the municipal connection point.
Once inside, the camera transmits live video to a monitor above ground. The technician watches the feed in real time, pausing to examine areas of concern. A professional inspection typically takes 30–90 minutes and requires no excavation, which means your yard stays intact from start to finish.
After the camera run, the technician reviews the footage with you directly. You see exactly what they see: cracks, buildup, root intrusion, or anything else hiding in the pipe. The session ends with a written or verbal summary of findings and, in most cases, a recorded copy of the video.
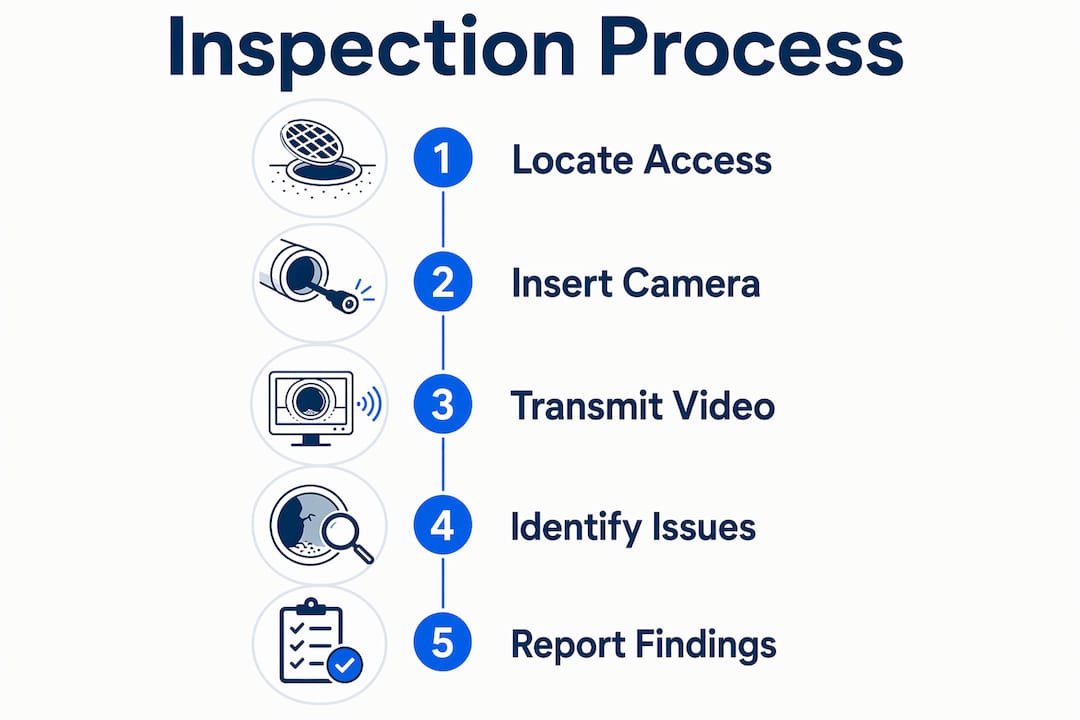
The step-by-step process looks like this:
- Access point location. The technician identifies the cleanout or determines an alternative entry.
- Camera insertion. The waterproof camera enters the pipe and begins transmitting live video.
- Navigation and inspection. The technician guides the cable through the line, noting problem areas.
- Sonde tracking. A radio transmitter on the camera head sends a signal above ground so the technician can mark the exact location of any issue.
- Footage review. The technician walks you through the video and explains what was found.
- Report and next steps. You receive a summary of the pipe's condition and a recommended repair plan if needed.
Pro Tip: Clear the area around your cleanout before the technician arrives. Overgrown landscaping or stored items near the access point add time and can delay the inspection.
What plumbing problems can a sewer line video inspection detect?
A sewer line video inspection identifies a wide range of pipe conditions that no surface-level check can catch. The camera captures everything from minor buildup to structural failure, all without a shovel.
The most common problems found during inspections include:
- Root intrusion. Tree roots enter through joint gaps and grow inside the pipe, eventually blocking flow entirely.
- Grease buildup. Cooking grease accumulates on pipe walls over years, narrowing the passage and slowing drainage.
- Pipe cracks and fractures. Ground movement, age, or freeze-thaw cycles crack pipe walls and allow soil infiltration.
- Offset joints. Pipes shift out of alignment at connection points, creating ledges where debris catches.
- Corrosion. Older metal pipes corrode from the inside, weakening the wall and reducing flow capacity.
- Sagging sections (bellies). Low spots in the pipe collect waste and standing water, accelerating deterioration.
- Collapsed sections. Severe structural failure that blocks the line completely and requires immediate repair.
Early detection of minor issues like grease buildup and early root intrusion prevents the costly backups and emergency repairs that follow when problems go unnoticed. Catching a small root intrusion costs a fraction of what a full pipe replacement runs.
Recorded video evidence also serves a practical purpose beyond diagnosis. Time-stamped footage from a sewer camera inspection gives property managers documented proof of pipe conditions for insurance claims and maintenance records. That documentation protects you in disputes and supports warranty or liability conversations with contractors.
What does preparing for a sewer inspection involve?
Preparation for a sewer camera inspection centers on one question: where does the camera enter the pipe? The answer determines how smoothly the job goes.
| Access option | What it involves | Best for |
|---|---|---|
| Existing cleanout | Cap removed, camera inserted directly | Most homes built after 1978 |
| Toilet removal | Toilet temporarily pulled, reset with new wax ring | Homes without a cleanout |
| Roof vent stack | Camera lowered through roof vent pipe | Limited access situations |
| New cleanout installation | Cleanout added to the line before inspection | Older homes needing long-term access |
If no cleanout exists, temporary toilet removal is the standard non-invasive approach. The technician pulls the toilet, inserts the camera through the floor flange, and resets the toilet with a new wax ring when finished. The process adds time but causes no permanent disruption.
For older properties without a cleanout, installing a new cleanout costs between $500 and $1,500. That upfront cost pays for itself quickly by making every future inspection faster and less labor-intensive. Drainpointplumbing recommends this upgrade for any Santa Maria home built before the 1970s.
Pro Tip: Ask your technician to confirm whether your home has a cleanout before the appointment. Knowing in advance lets you plan for the toilet removal option if needed, so there are no surprises on inspection day.
How do sewer cameras locate problems precisely underground?
The camera alone shows what the problem is. The sonde transmitter tells you exactly where it is. That distinction matters enormously when it comes time to repair.
A sonde is a small radio transmitter attached to the camera head. As the camera travels through the pipe, the sonde broadcasts a continuous radio signal upward through the soil. Above ground, the technician uses a handheld receiver to track the signal's position and depth in real time.
The sonde locator technology turns a vague pipe problem into a precise repair target. Instead of excavating a 20-foot trench to find a cracked joint, the crew digs one small hole at the exact marked location. That precision reduces labor, cost, and damage to your landscaping.
The practical benefits of sonde-based location tracking include:
- Targeted excavation. Crews dig only where the problem is, not along the entire pipe run.
- Accurate depth measurement. The receiver shows how deep the pipe sits, which affects repair method and cost.
- Faster repair planning. Contractors receive exact coordinates before they ever pick up a shovel.
- Reduced property disruption. Smaller dig sites mean less concrete, pavement, or landscaping to restore afterward.
Without sonde technology, locating an underground pipe defect is genuinely difficult. Guesswork excavations are expensive, slow, and often miss the mark on the first attempt.
What are the benefits of professional inspections over DIY camera kits?
Rental camera kits exist, and they do transmit a video image. The problem is that a clear image and a useful diagnosis are two different things.
DIY sewer camera kits lack the ability to interpret subtle pipe damage signs that professionals identify in the footage. A homeowner watching the same video feed as a licensed plumber will miss early corrosion patterns, minor joint offsets, and the early stages of root intrusion. Those are exactly the problems worth catching before they become emergencies.
Professional inspections offer several concrete advantages:
- Higher resolution cameras. Commercial-grade equipment captures sharper images in smaller-diameter pipes.
- Expert interpretation. A skilled technician reads pipe conditions the way a doctor reads an X-ray, not just describing what they see but explaining what it means.
- Documented video records. For older homes, keeping the video footage is recommended because it shows pipe conditions and remaining useful life better than any written report alone.
- Sonde capability. Most rental kits do not include a sonde transmitter, so you get a diagnosis without a location.
- Insurance-ready documentation. Professional reports carry more weight with insurers than self-produced footage.
A skilled operator's knowledge is critical to the value of any inspection. Poor interpretation limits the outcome regardless of camera quality. That is the core reason professional inspections consistently deliver better results than DIY alternatives.
Pro Tip: Request a digital copy of the recorded footage after your inspection. Store it with your home maintenance records. If you sell the property, that video is a credible disclosure document that buyers and their inspectors will appreciate.
Homeowners who treat sewer inspections as preventive maintenance rather than emergency responses consistently spend less on plumbing over time. Scheduling an inspection every few years, or before buying a property, is the most cost-effective approach to sewer line management.
Key Takeaways
A sewer camera inspection is the most reliable, non-invasive method available for diagnosing hidden pipe conditions, locating defects precisely, and preventing costly emergency repairs.
| Point | Details |
|---|---|
| Non-invasive process | Inspections take 30–90 minutes with no digging required, leaving your yard undisturbed. |
| Sonde precision | A radio transmitter on the camera head pinpoints underground problems to an exact location and depth. |
| Early detection saves money | Catching grease buildup or root intrusion early prevents expensive backups and emergency repairs. |
| Access preparation matters | Knowing whether your home has a cleanout before the appointment prevents delays and unexpected costs. |
| Professional expertise is irreplaceable | Expert interpretation of footage identifies subtle defects that DIY kits and untrained eyes routinely miss. |
What I've learned after years of sewer inspections
Most homeowners schedule a sewer camera inspection only after something goes wrong. A slow drain, a foul smell, or a backed-up toilet finally pushes them to call. By that point, the problem has usually been developing for months or years.
The most valuable use of a sewer inspection is before any symptom appears. Establishing a baseline condition of your pipe system gives you a reference point for every future inspection. You are not just diagnosing a current problem. You are building a maintenance history that makes every future decision easier and cheaper.
One misconception I hear regularly is that sewer inspections are complicated or disruptive. They are not. Most residential inspections wrap up in under an hour. The technician arrives, locates the access point, runs the camera, and walks you through the footage before they leave. The disruption is minimal.
Another misconception is that you need a cleanout for the inspection to work. You do not. Temporary toilet removal is a standard technique that gives full access to the main line. The toilet goes back in the same day with a new wax ring, and you would never know it was moved.
My strongest advice is this: keep the recorded footage. Written reports summarize findings, but the video shows the pipe's actual condition. For older homes especially, that footage tells a story that no written summary can fully capture. When you eventually need a repair or want to sell the property, that video is worth more than you expect.
— Kirk
Drainpointplumbing's sewer camera inspection services
Drainpointplumbing brings over 15 years of sewer diagnostic experience to every inspection across Santa Barbara County. The team uses commercial-grade waterproof cameras with full sonde locator capability, so every problem gets identified and precisely mapped before any repair work begins.
Every inspection includes a recorded video walkthrough and a clear summary of findings. You leave the appointment knowing exactly what condition your sewer line is in and what, if anything, needs attention. For homeowners and property managers who want a reliable diagnosis without surprises, Drainpointplumbing's sewer camera inspection service is the right starting point. You can also request a free quote to schedule your inspection today.
FAQ
How long does a sewer camera inspection take?
A professional sewer inspection typically takes 30–90 minutes. The exact time depends on pipe length, access conditions, and how many problem areas the technician needs to document.
Does a sewer camera inspection require digging?
No digging is required. The camera enters through an existing cleanout or, if none exists, through a temporarily removed toilet, leaving your yard and landscaping completely undisturbed.
What is a sonde transmitter and why does it matter?
A sonde is a radio transmitter attached to the camera head that broadcasts its location through the soil. A technician uses a handheld receiver above ground to pinpoint the exact location and depth of any pipe defect, which makes repairs faster and less expensive.
How often should homeowners schedule a sewer inspection?
Most plumbing professionals recommend a sewer line video inspection every 3–5 years for standard residential properties, and before purchasing any home, particularly older properties with clay or cast iron pipes.
Can a sewer camera inspection detect all pipe problems?
A camera inspection identifies the most common issues including root intrusion, cracks, offset joints, corrosion, and blockages. Certain defects in very small-diameter branch lines may require specialized equipment beyond a standard main-line camera.